Classrooms
Classrooms allow instructors to see how each student who joins their classroom is studying, from practice test scores to progress in Cram Course, Practice Lessons, Flashcards, Study Guides, and Essay Grader. Everyone who participates in a Classroom must have an account. Anyone can create an account for free. If you have not signed up yet, create an account before continuing.
Setup your Classroom
Create Classroom
To create a classroom, you will have to sign in to your account and visit Classrooms to get started.
- Select Create a Classroom.
- Enter your classroom name and select an exam that you plan to study.
- Select Create Classroom to confirm classroom details.
After confirming your classroom details, use the classroom page to invite students and manage your classroom.
Invite students
Once you create a classroom, you need to invite students.
- Select Add a Student.
- Enter the email address of the student.
- Select Invite student to send the classroom invitation email to your student.
Your student will receive an email from us with a link to join the classroom. Each student will create their account if they don’t already have one.
Manage your Classroom
See how your class is doing
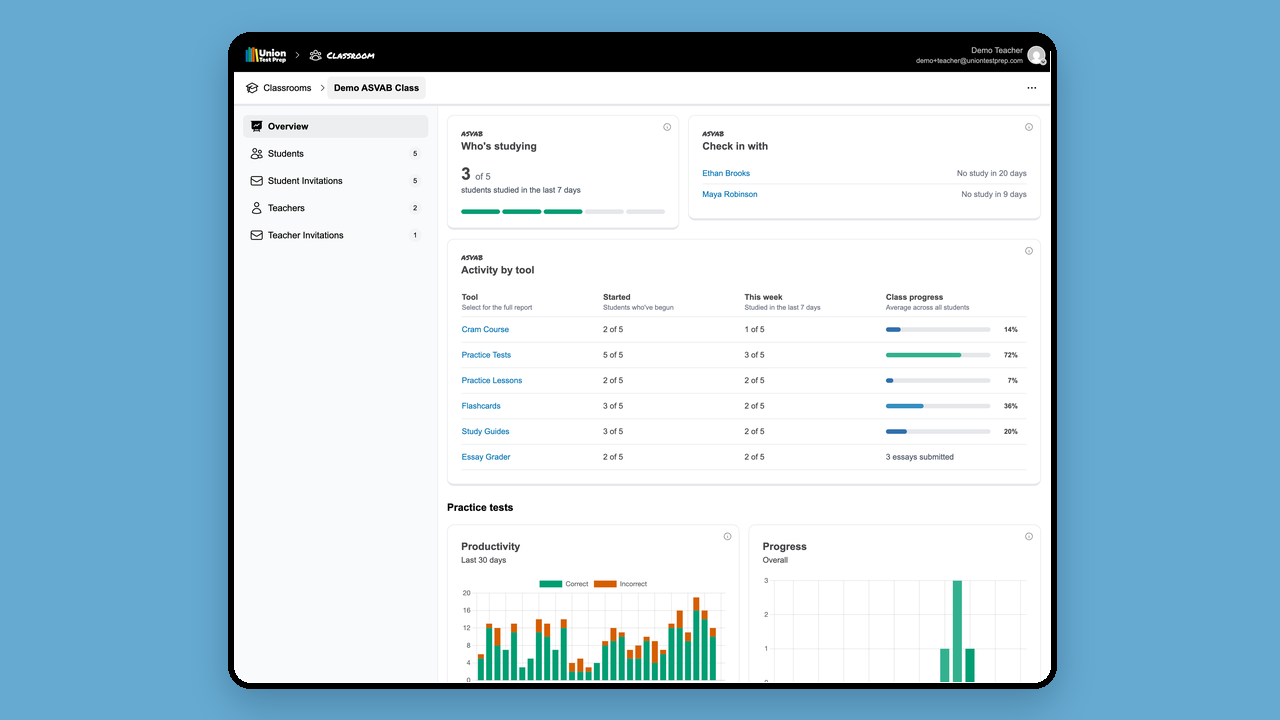
Open a classroom to see its Overview: how many students studied in the last 7 days, who to check in with, and how the class is doing in each study tool. Select a tool to open its full report.
View student progress
Students appear in your classroom as soon as they accept your invitation. (If a student hasn’t accepted yet, you will see the option to resend the invitation.)
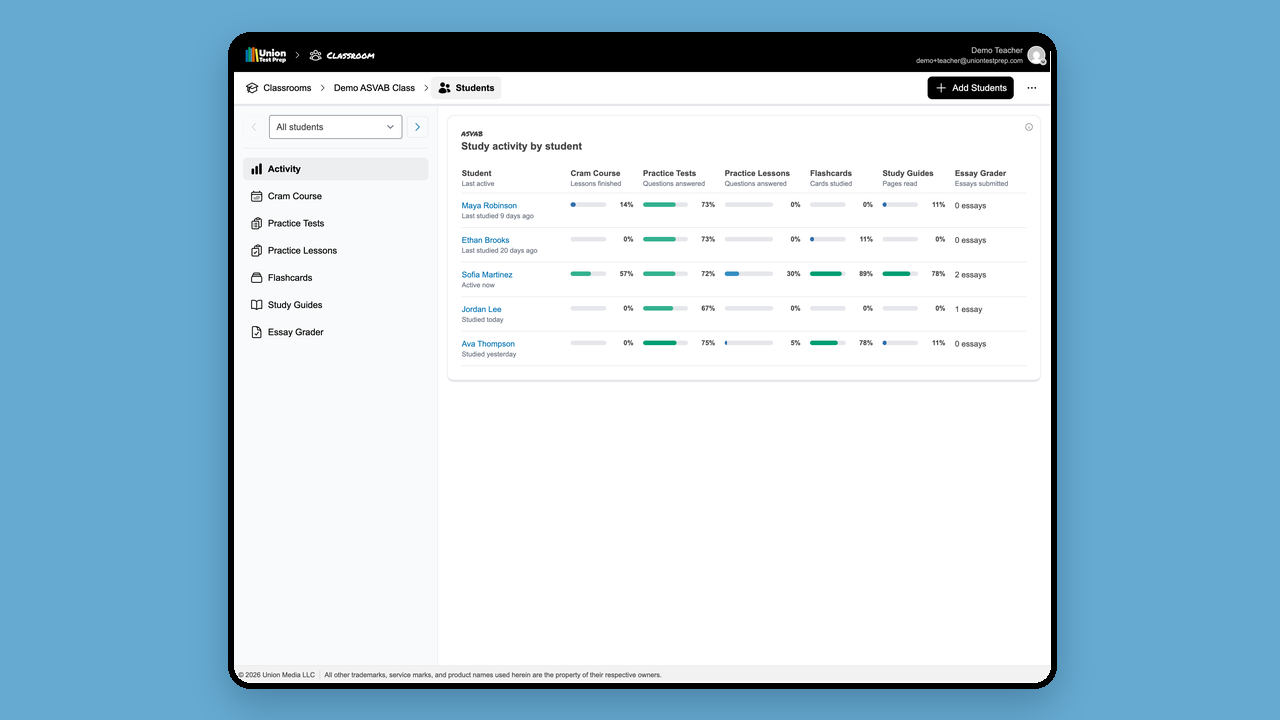
- Select Students in your classroom.
- Choose a report from the side navigation: Activity, Cram Course, Practice Tests, Practice Lessons, Flashcards, Study Guides, or Essay Grader. Only the tools your classroom’s exam offers are listed.
- Activity shows every student’s progress in every tool, plus when they last studied. Each tool’s report shows more detail, such as where each student left off.
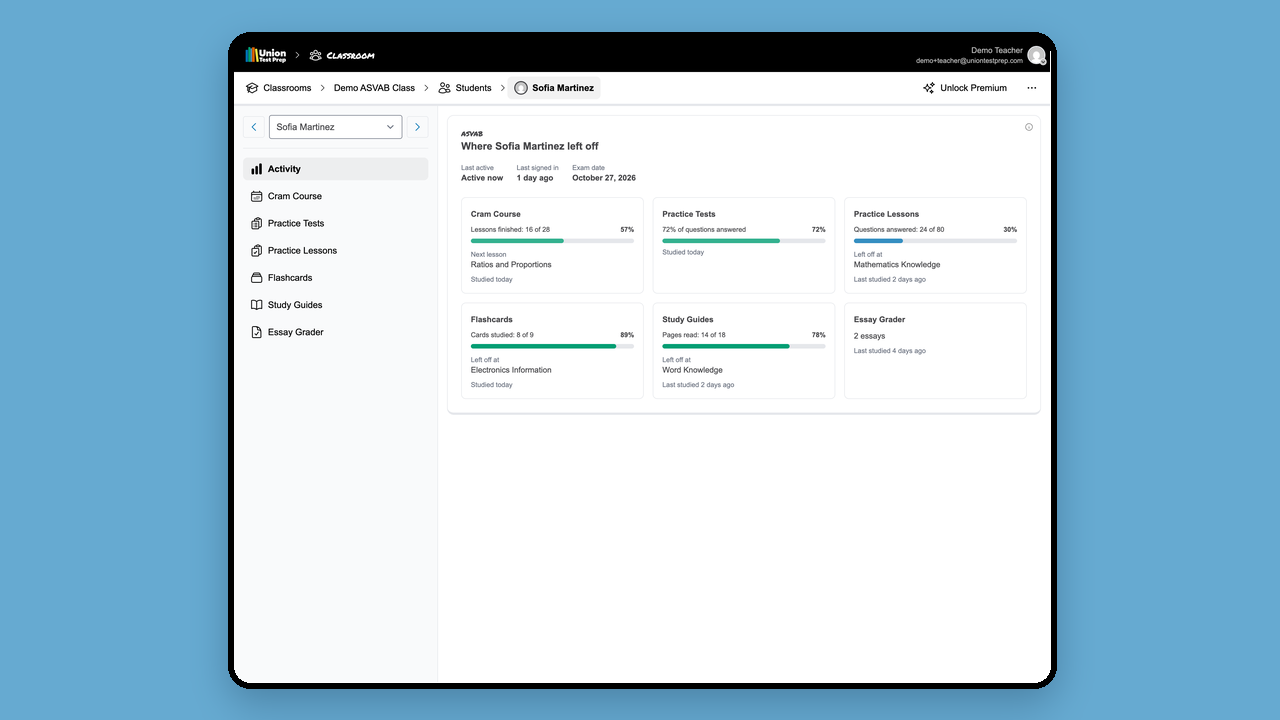
To see one student, select their name or pick them from the student switcher at the top of the side navigation. Use the arrows to move to the previous or next student, or choose All students to return to the class.
Some things to know:
- Progress counts all of a tool’s content, including Premium content. Premium content is labeled in each report, and students without Premium can’t open it, so they may not reach 100%.
- Practice test scores, proficiency, and preparedness are on the Practice Tests report.
- To print a report, open it and choose Print from the … menu at the top right.
- Select the info icon on any report for an explanation of each column.
Edit a classroom
You may need to change the details of your classroom. To revise details of your classroom, enter classroom edit mode:
- Visit Classrooms and select the classroom you’d like to edit.
- Press the button.
- Options to edit the classroom name, remove students, and finish editing are displayed.
Change classroom name
- Find the classroom name and select the button.
- Enter the new classroom name into the text field.
- Press the Update Classroom button to save changes.
Edit and remove Students
- Find your list of students, then select the student you wish to remove.
- Select ok in the confirmation modal to remove the student
You cannot change the name or email address of a student. You can, however, invite a student again using a different email address.
Remove a classroom
Classrooms cannot be removed or archived at this time. You can always edit a classroom to reuse the classroom.
Upgrade your classroom
If you need to provide students with a Premium account, contact us.
Other issues
- Each classroom has one exam.
- There is no limit to the number of classrooms you can create.
- There is no limit to the number of students you can add to a classroom.
- Some school districts will not allow students or faculty to receive emails from third parties. You may need to ask your IT department to whitelist / to receive emails from us.
- View a student to resend an invitation to the added student.
Didn't find what you’re looking for? Let us know.